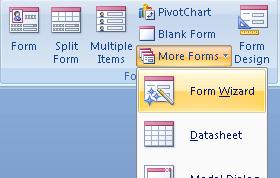
Creating Forms
Access allows you to create Forms both in "Design View" or through the "Form Wizard".
Access has a series of wizards which allows us to create Forms which makes the task easier for us. We just need to select the table we want to use. We do this by selecting the Table in the "Tables/Queries" field.
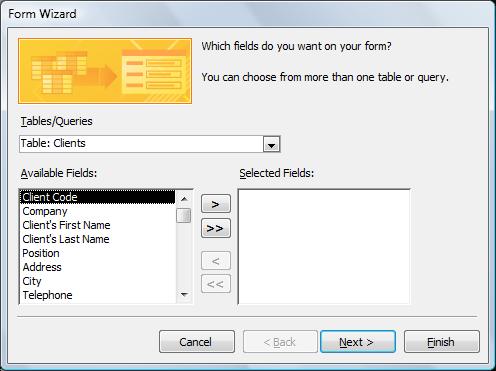
In the lower left hand corner, we have the "Available Fields". Here, we have all the available fields in the Table. With the centre buttons, we can select the fields we want in our Form one by one using the upper button or all of them at the same time using the lower button. We can use the lower pair of buttons to undo our selection in case we need to rectify. Once we have selected the fields we want to use, we click on "Next". In the following window, we are asked the layout of the Form we want to use.
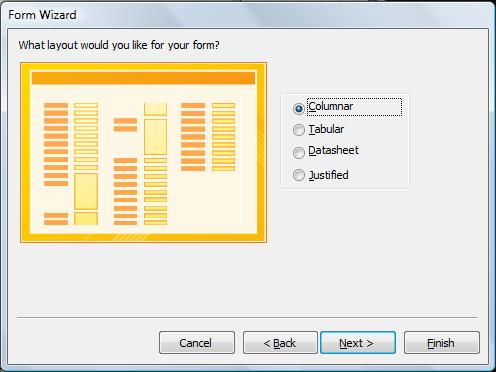
In this case, we will use the Columnar Layout and click on "Next". In the following window, we will be asked the style we want to use. I chose "Metro" for this example. You can browse the options and choose the one you like.
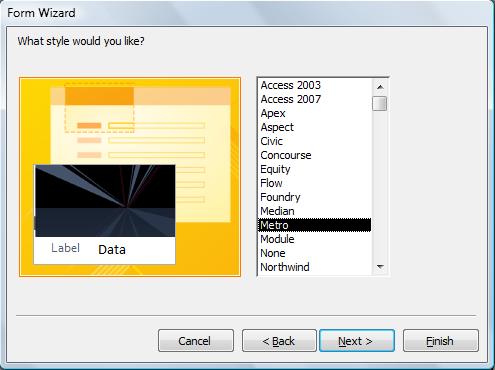
This is the decoration for our Form. After you have made your selection, click on "Next".

This new window will ask us for a Title for our Form. We will also be asked if we want to open the Form now or if we would like to modify its design. This last option will be seen in the next Lesson. Now, click on the "Finish" icon to see how our Form looks like. This is our brand-new Form:
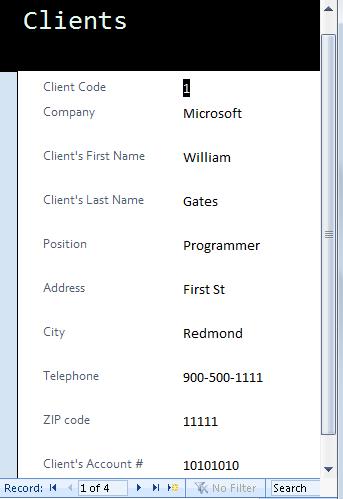
As you can see, all the fields are accessible. The way to move around them is easy and comfortable. With the lower buttons, we can move around the different Records of our Table. With the button to your right, we can create a blank record to insert new data.