Design View for Forms
After finish creating our Form from the wizard, we were asked if we wanted to change its design.

At that moment, we chose not to. Well, it is time we learned how to modify the design of our Form. We do this by clicking on the "Design View" of that Form.
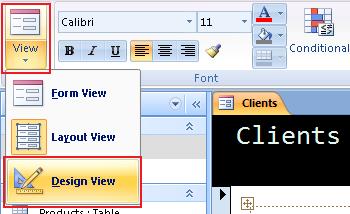
This changes the view to the Design View which will show us the skeleton of our Form.
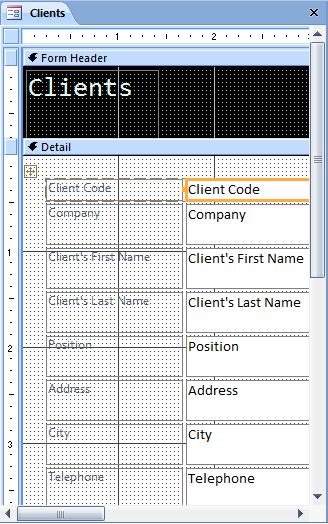
There are different sections in this view: "Form Header", "Detail" and "Form Footer".
The Form Header contains everything we want to appear at the beginning of the form. The Form Footer has everything we want to appear at the bottom of the Form. The content found in the "Details" portion is repeated once for every record our Form shows.
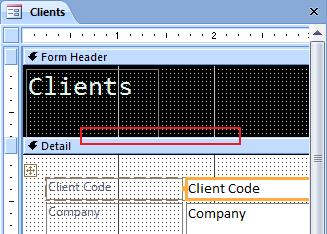
In the Form Header section, we will introduce the Title of the Form, the date, a brief synopsis, etc...
First, we need to get a little space to introduce our data. To do this, we use the mouse and click and drag the border between the Header and the Detail sections.
Once we have enough space for us to work in, we click on the title and click on the left button on our mouse to open up a menu like this:

Now, we will learn how to use the Text Control Tools to re-design our Form.

As you can see, there are many available icons. We will only use the icon to place Labels for our Company and the Date. The rest of the options are design options and won't be covered in this course. However, you can use the Help from Access to guide you in those matters.

