Introducing data in our tables I:
-INTRODUCING DATA
There are two ways to insert data in a database: the first one is writing directly into our table and the other one is by using the "Data Sheet".
In this lesson, we will learn how to insert data by using the Data Sheet.
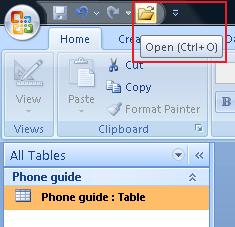
To do this, we will open an existing table. There are 3 ways of doing this, using the Office button or by clicking on the "Open" icon in our quick access toolbar.
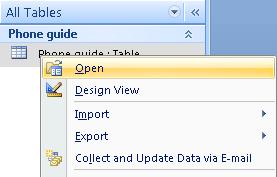
And the last one is by choosing the option "Open" from the menu opened by the right button on your mouse after placing the cursor on the table you want to open. You can also double click on it.
A window like this will pop up.

We see the fields in our table organized as we did in previous lessons. In them, we will insert the data.
Each row is a "Record". A "Record" is a group of data which are related. This will be clearer as we fill the Records.
The data is introduced in its corresponding column. If the space in which you are typing isn't enough, Access will deploy the text to the left for you to keep on typing. You can also widen the size of the column by using the cursor (clicking and dragging).
.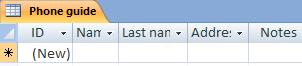
Right now, you will find that all the fields are empty.
The "Id" field is an "AutoNumber" field which means we will NEVER be able to insert any data in it. This is an internal control field for Access.

