Introducing data in our tables II:
After these essential notions, we are ready to insert our first record. We will use specific data but you can use anything you want for your example. However, I recommend for you to use the same examples if you wish to follow the explanation as we are doing the example.
This is the data we will insert:
Name: George
Last name: Clooney
Notes: Movie actor
Address: Station St.
City : Solaris
ZIP Code: 31141
Telephone #: 900101010
We will insert each piece of data in its corresponding field. As we click on the first row, a new row will appear just below it.

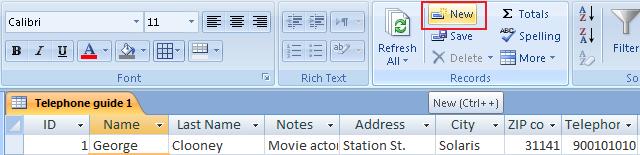
The "Id" field presents an automatic sequential number according to the manner in which we insert the records.
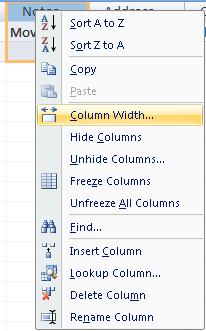
In the "Notes" field, in spite of having introduced the entire information, we will only see a part of the data. To be able to read the rest of it, we can click in the field and widen it using the cursor or by modifying the width of the column by clicking the button on your mouse and dragging it. We can also use the option "Column Width" from the menu we access by clicking the right button on your mouse and placing it over the column you want to widen,
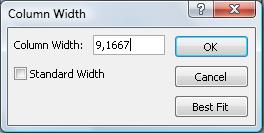
This is the window we use to modify and define the width of a column.
The symbol "*" of the last row indicates it is the last record in the table. As we insert more data, we will get new rows.
To insert new records, we can click on the button "New" in the toolbar.
And so on successively.

