Sun Stitch or Spider Stitch.
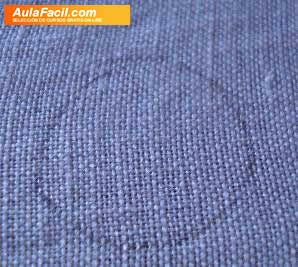
To make this stitch, first we trace a circle the size we have chosen to embroider. We can use a coin for help. As we trace the circle, we do not press the pencil hard so the edge won't stick out of the Embroidery.
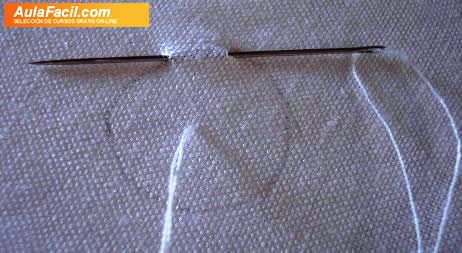
NOTE: For this Embroidery, we need to use a frame because this type of stitch needs for the fabric to be tense.
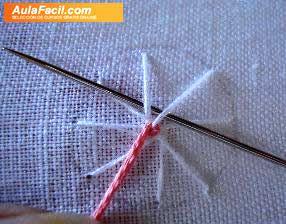
We start from the middle of the circle we have traced and begin forming radiuses. The needle will be double threaded. We insert the needle in the exterior trace of the circle following the direction of the radius. We pull the needle out again to the left of the outer trace of the circle and we insert it next to the exit Stitch of the first radius, in other words, the centre of the circle. We continue embroidering the necessary radiuses stitching from bottom to top and vice versa until the entire circle is embroidered.
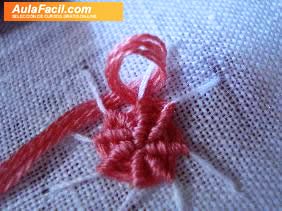
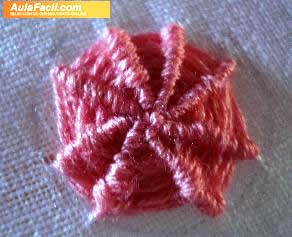
NOTE: The radiuses we have embroidered will be the base to hold the Embroidery which is done starting from the centre of the circle.

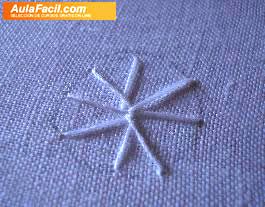
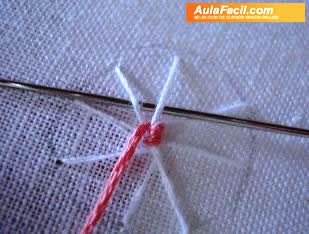
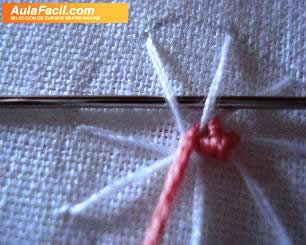
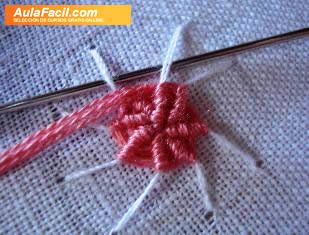
We thread the needle with the colour of the thread of our choosing. We pull the needle through the centre of the circle and starting from here, from right to left, we pass the needle once over the radius and another time under the radius until we reach the initial Stitch. From this point, we continue passing the stitch for the thread of the radius which was on top ends in the bottom position in the second pass. We continue doing the Embroidery in the same manner, in other words, alternating the way we pass the needle over and under the thread. As a result of this alternating action, when we are finished filling the radiuses, we will have a flower with a radius-like crown. We can combine this Embroidery making the centre in one colour and the rest in gradient, depending on your taste.