Exposure

Now that we know and understand the 3 variables or values which control exposure (ISO, diaphragm and shutter speed) and we have learned how a photometer functions, we will learn what we need to do to properly expose a photograph.
Exposure, when talking about photographs, refers to the quantity of light which reaches the film or sensor during the process of taking pictures. A correct exposure can be defined as the exposure which achieves the effect the photographer wants.
A photograph which is under-exposed is photograph which didn't get enough light and, thus, lost some detail in the dark portions of the scene.
An over-exposed photograph is that one which received too much light. This results in a photograph with bright parts with no details. In other words, it has parts which are completely white (sometimes called "burned"). We will see some examples of over-exposed and under-exposed photographs in later lessons.
We always bear in mind that when we are talking about over-exposed and under-exposed photographs we are talking about mistakes. A photograph may have received too little or too much light intentionally to achieve a specific effect sought by the photographer. In such case, this picture would be considered as properly exposed. To achieve this, we need to understand how exposure works and all its basic principles. This way, we can begin to shoot more creative pictures.
We will see 2 examples below, one received more light and the other received less light intentionally to achieve a specific personal touch.
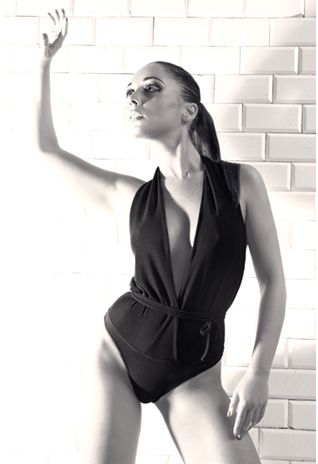
In this photograph you can plainly see how the photograph received too much light. As a result, the illuminated portions lost detail and they "burned". I did third on purpose to achieve the sensation of extremely bright light, thus, this photograph is properly exposed.
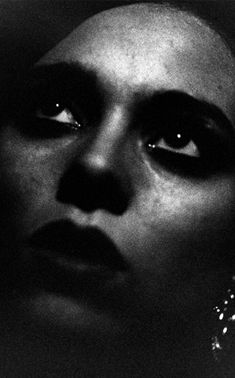
This photograph was taken with a black and white film - ISO 3200. The idea was to emulate photographs of the 20's. The photograph received very little light and thus, it lost detail in dark areas. This is the effect I was looking for, so the picture is properly exposed.
So, how do we achieve a proper exposure? As we mentioned before: there are 3 variables or values which control the proper exposure of a photograph (ISO, diaphragm and shutter speed).
First, we need to decide on the ISO we will use. In the lesson about film speed, we mentioned when is it usually better to use a higher or a lower film speed.
In electronic or mechanical SRL cameras, remember that these are the ones that use film, and compact film cameras, we simply need to load the film into the camera. When the film is loaded into a mechanical SRL camera we need to set the ISO we are using. This way, the camera will know how to measure and expose the photograph. In the case of compact and SRL cameras, we don't need to set the ISO since films come with a DX code (something like a barcode) which cameras can read and know what ISO will be used.

