Exposure
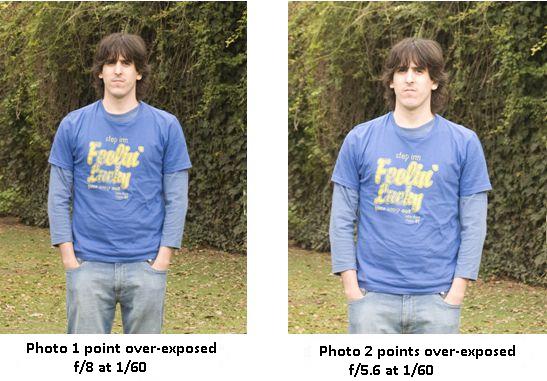
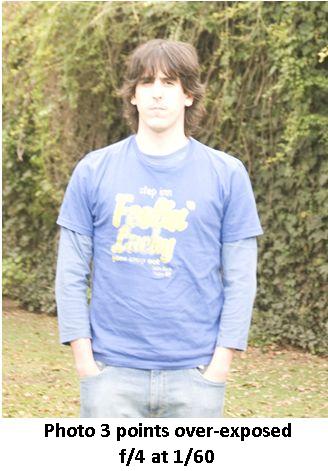
As you can see from these pictures, it is not usually convenient to change shutter speed or diaphragm without compensating the opposite. However, as we mentioned before, there will be situations in which we can use this to achieve darker or brighter images with a personal touch.
In the lessons on photometers, we mentioned how it can sometimes create mistakes, specially in situations in which a scene is too dark or too bright. In these situations, we can also open or close the diaphragm, or increase or decrease shutter speed without compensating the other value for a photograph to be properly exposed.
Lets go back to the example of taking the picture of a white dove on snow. As we said before, the photograph will come out too dark because the photometer is trying to compensate the fact that there is too much light. What do we need to do in order for this picture to come out properly exposed?
Let's imagine we measured the photograph with the photometer in the camera and it resulted in f/11 at 1/500th of a second. What we need to do is allow more light to come into the camera than the result indicated by the photometer. Instead of shooting the photograph using f/11 at 1/500, we can use f/11 at 1/250 (1 point more of light) or f/11 at 125 (2 points more of light). Generally, these type of situations will require a correction of approximately 2 points. However, if you are not sure, it is always advisable to shoot different pictures using different settings to make sure we achieve the proper exposure. Remember that from this first value of correction, for example f/11 at 1/60, we can use any combination which allows the same quantity of light into the camera.

