Noon
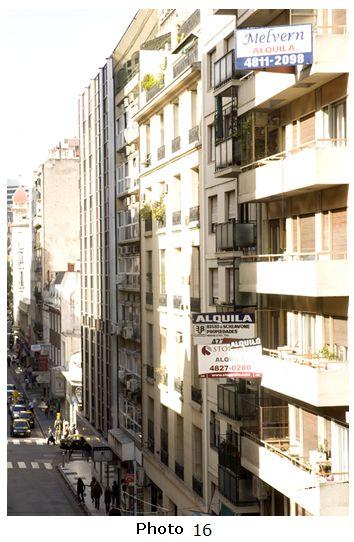
This photograph was taken just after photograph 15. However, instead of measuring the illuminated areas of the scene, I measured the buildings (shades). Why did I do this? To bring out the detail in the shadows.
The exposition for this photograph was f/9 at 1/125, with an ISO 200. This means that to expose this photograph correctly, I allowed 2 points and 2/3 more of light into the camera: from f/9 to f/11, there are 2/3, from f/11 to f/16, there is 1 point, and from f/16 to f/22, there is 1 point.
As you can see in the photograph, the dark parts in photograph 15 now have detail. We can see the street, people walking, etc. However, the illuminated parts of the scene lost almost all its detail. The photograph looks washed and without brightness; even colours are not saturated.
In this example, and I think you will agree with me on this one, photograph 15 is much more interesting than photograph 16, since this last one doesn't have the type of illumination which provokes the viewer to keep looking at the photograph. It also lacks detail in the shadows to make the loss of detail in the bright areas be worth it.
Under no circumstance, this means we always need to measure the bright areas of the scene. There are times in which it is more convenient to measure shadows to expose a photograph. However, once again, it will be the photographer who needs to decide what will be shown at the time of taking a picture. Every photograph is different and each light situation is different.
Nowadays, since most people use digital cameras, we can try different expositions to make sure we get the type of photograph we are looking for. It is always better to take several photographs of the same scene to achieve what we want instead of shooting just one and finding out it didn't come out as we expected. This also works for people who use film. It is always better to have a great photograph!

