Modifying our Tables
The composition of web pages is organized by arranging our text and images inside tables. Therefore, it is a common practice for us to modify and adjust them. Let's create a table and modify it.
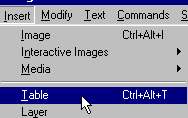
- we click on Insert on the toolbar.
- we click on Table on that menu..

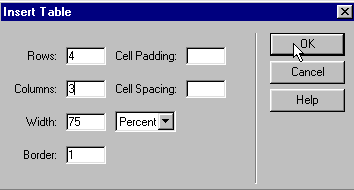
This brings up the Insert Table box which allows us to define the Table. In our example, we will create a table with 3 columns and 4 rows, just as you see in the image below. We click on OK.

And this is the result.
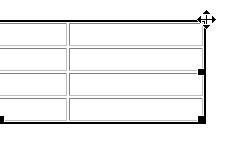
Now, we select the table to be modified. We place the cursor on the corner of the table (see image below) and a cross will appear. Clicking on the left button on our mouse, we select the table.

Another way of selecting our table is by placing the cursor over the table. The lower bar (at the bottom of the screen) shows us the HTML instructions. Click on <table>, just as you see in the image below.

And, a quick way to select a table to modify it is:
- We place the cursor inside the table.
- We click on the right button of your mouse.
- In the menu that appears, we place the cursor over Table.
- We click on Select.

Once the table is selected, the properties menu (or floating menu) will show us the box used to modify our table. .

For this menu to appear, it needs to be active. In case it is not, on the toolbar, click on Window and then Properties.

Now, we can modify our table. For example, we can change the alignment of the table for it to be aligned to the right. We do this by selecting Align and Right, just as you see in the image.
