Table Options
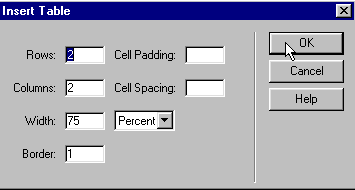
Now, we will learn how to modify and use the different options available for tables. To begin our example, we will build a table with 2 rows and 2 columns with a visible border. . We click on Insert on the toolbar and we select Table. This brings up the Insert Table box. We type in the number of rows and columns we need and click on OK.
This is the result:
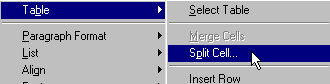
Dividing a cell.
- we place the cursor over the table.
- we click on the right button of our mouse.
- we select Table
- we click on Split Cell
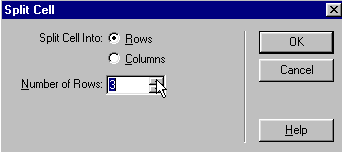
This brings up the box which allows us to define the way we will split our cells. We can select a horizontal or vertical division and the number of cells we will dived it into. In our example, we want to divide it into 3 Rows.
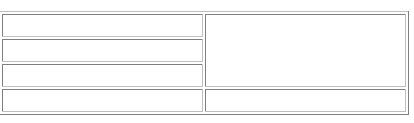
And this is the result.
In the same manner, we can divide a cell into columns. In our example, the large cell on the right will be divided into 4 columns. We place the cursor over the cell we want to divide. We click on the right button of your mouse and we select Split Cell.
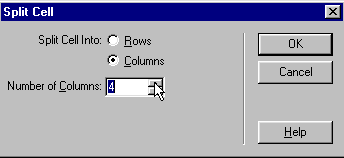
We select Rows or Columns. In our example, we have marked the slot for Columns, as you can see in the image above. The number of columns we choose is 4. The result is the following:


