STAGE 2. DEFINING A SITE WITH DREAMWEAVER
To be able to manage a web site and save those files in a directory, it is important for us to define a site. When defining a site, Dreamweaver knows that these files belong to the same web site. Therefore, we can perform a series of operations in a quick manner and with less mistakes. As a result, it is advisable for us to create a site for a web site; especially if it's complex.
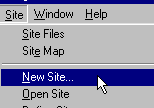
- We click on Site on the toolbar and we select New Site
- The "Site definition" window will appear.
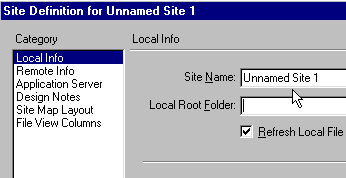
Then, we use this window to name and create our site.
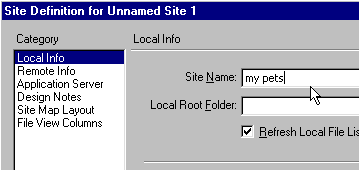
A) Naming the site. This box allows us to designate a name to the site. On the "Site Name" ("Unnamed site 1" as default), we write the title for our web site. For this example, we have used the name "My Pets".
Now, we need a directory (folder) in our hard drive to save our web site. If the directory we want to use with Windows explorer has already been created, we can skip the next step (B).
B) Creating a directory to save the site. We click on the folder icon at the end of the Local Root Folder field.

- In the following window, we click on the folder icon (in red square) to create a new folder.

- We create a folder under the name "New Folder". This time, we will change the name to "My Web".

- We write MyWeb as the name for this new folder. Click on Enter.

C) Selecting a directory as a site for the web site. Now, we have our directory created to save our files. We need to select it as the place where the web site will be placed. Again, we click on the folder icon.
Then, we select the directory we want to assign to our web site by double clicking on it. For example, the one we have created: MyWeb.

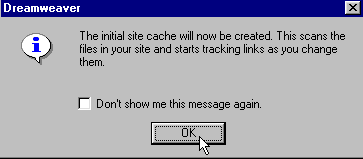
We need to accept the creation of the site cache by clicking on 'OK'.
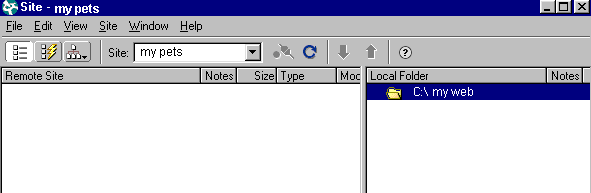
On the site window or "Site", we are allowed to manage the files which compose our web site.