A SIMPLE PAYROLL WITH EXCEL
In this lesson, we are going to make a simple payroll and put everything we have learnt so far into practice.
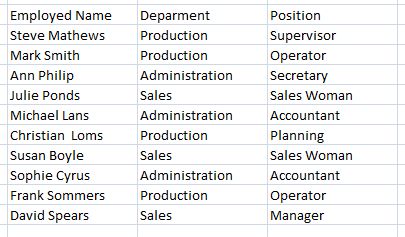
For this example, we are going to use a payroll composed by 10 employees. We will identify them through the department they work in and their charge or position.
In the columns, we will use the attributes: Employee name, Department, and position.
In the rows, we will list the employees alphabetically according to their last names (surnames). We will use the following information for this example.
1. We select the cell in which we are going to start our payroll. For example, we will start in cell C2; in it, we will write Employee Name. In D2, Department and in E2, Position.
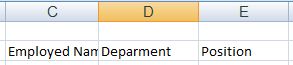
As you can see, the information doesn't fit inside the column. As a result, we can practice increasing the size of the column, as we have learned from previous lessons.
Remember: we place the cursor on the border between columns C and D. Clicking the left button on your mouse and keeping it pressed, we move the mouse to the right until we reach the desired width for column C.
Lets do the same thing for column D. It should have enough space to fit in the information.
2. Once we have widen the columns, we can begin writing the employee information.
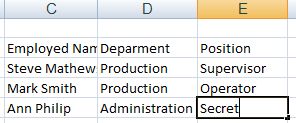
In the image above, we can see that some information is being written about an employee; specifically, we are writing her position: Secretary.
In a previous lesson, we saw the formula bar above the worksheet. It shows the information or function we are writing. Lets see what this bar shows:
 , if we have selected the cell E5 and we are writing SECRETARY
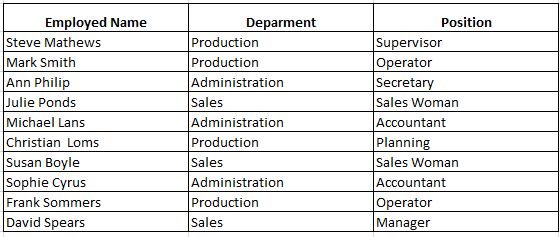
3. We finish listing the employees, their department and position.
Lets see how our table (chart) looks.