We are practically finished with our banner. Now, we can post it in our blog or web site. To do this, we can save it in any format allowed by web browsers. We have already talked about the different extensions in which a finished Gimp document can be saved.So, this time, we will see another option: Scaling an image in case we need to increase its size or reduce it.
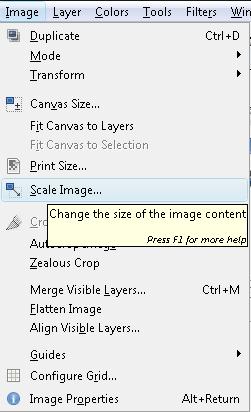
To do this, we must go to the Image Menu and select Scale Image.
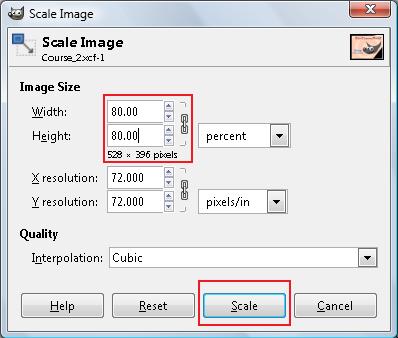
Every time we resize an image, we can choose its units expressed in pixels, centimetres, millimetres, etc., by accessing this menu. One of this variables can also be percentage.
By default, the program works in a way that if we alter one number, the other will also be altered. This way, it will increase/decrease proportionally for both the X axis (width) as well as the Y axis (height).
We can also change its resolution for a higher one, but since this banner will be uploaded to the internet, it is better if we leave it as 72 ppp
We accept any changes made by clicking 'Scale'. Then, we are ready to save our document in any extension we deem appropriate for its use.