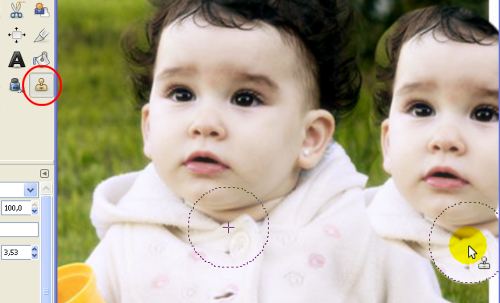
Now, we will work with the Healing Tool. Generally, we use this tool in case we have some stained areas, which is normal in portraits: the model's face has spots or stains.
This tool is similar to the Cloning Tool. It can even be used as a substitute sometimes. Let's see how this tool works to understand its use better.
When cloning, we get an identical copy of the original. We saw its use when we were correcting some areas of the banner. It takes a point or area as reference using the CTRL key to mark that area. Then, after releasing the CTRL key, we place the cursor wherever we want to and it will create a copy of the original for every pixel we move over. Thus, we get a perfect clone.
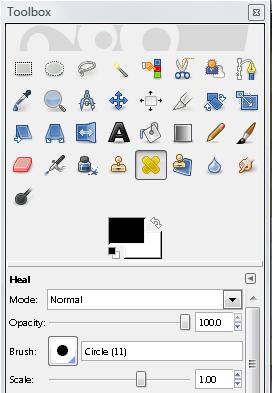
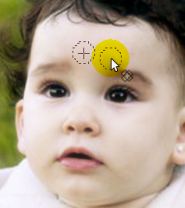
In the case of the Healing Tool, after marking an area with the CTRL key, it doesn't create a clone as we move the cursor; it takes that marked area, which possesses a specific colour value, to modify the areas (generally adjacent) were the spot or stain is found. Thus, we fix the problem.
The use of this tool is also subject to trial and error. We also need to carefully consider the areas we are selecting as a sample to heal. This surely responds to a little knowledge about illumination and anatomy which we can't explain here.