Adding images to Posts and Pages
 We've learned how to create Posts and Pages, but one of the features you might find yourself using often when creating content is embedding images into your text.
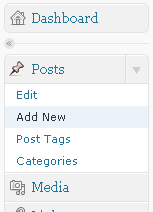
From the Dashboard, under the "Posts" heading create and new post be clicking "Add New".
Add a title, add a paragraph of text and place your cursor at the very start of the body text. This is where we will insert an image.
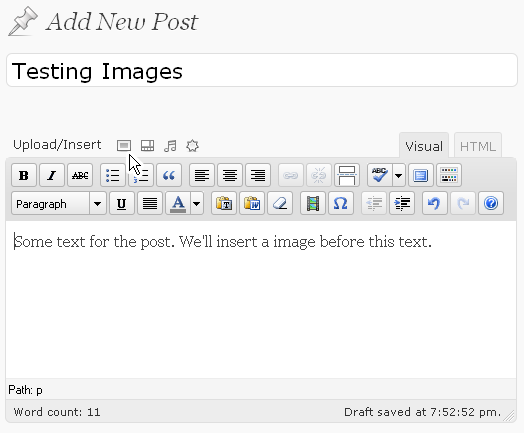
Just above the blue toolbar of the main body text area you'll see the Upload/Insert options. The first icon is for images. Click it.
There are three sources to choose from when a new window opens up:
- From Computer - you can upload an image from your computer to WordPress's Media Library and at the same time insert it into the post
- From URL - if you have the URL of an image, either on your website, on another, or maybe a photo hosted on a photo sharing website, you can insert the image from there without uploading it to WordPress
- Media Library - You can insert images previously uploaded to the media library.
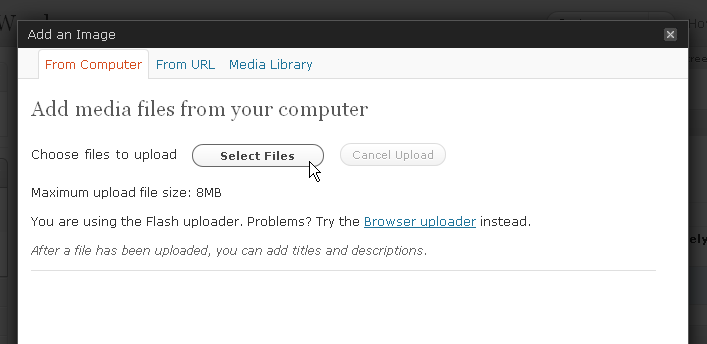
Let's upload our first image from your computer. Select the "From Computer" tab if it is not already selected, then click "Select Files".
Find and choose an image on your computer of a regular size - one not so small that it fits perfectly in the page (because we are going to look and what to do in those cases) and one not so big that it takes ages to upload. A file of a couple of hundred KB and a resolution of around 800x600 pixels will do.
Select the image and upload it.

You'll see the progress bar fill, and WordPress will tell you it is "crunching" the image, a process in which it saves it to the server.
[Did you get an error? Make sure, with your FTP client, that /wp-content/uploads/ exists and is writable, or ask you web host to help you]
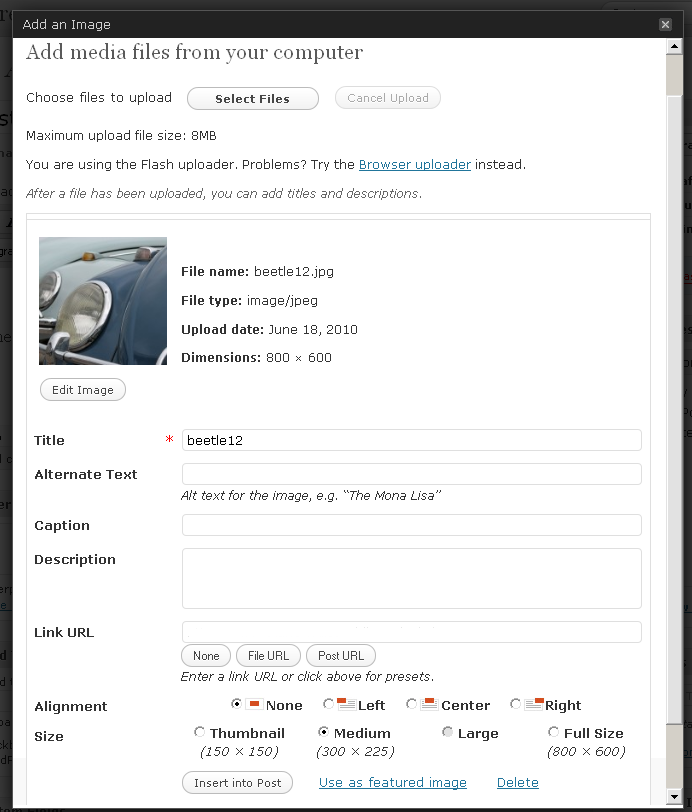
With the image uploaded, you'll now have to edit its metadata, the name and description and where it usually links to - this data will follow the image around wherever it is used, so keep it accurate as possible.
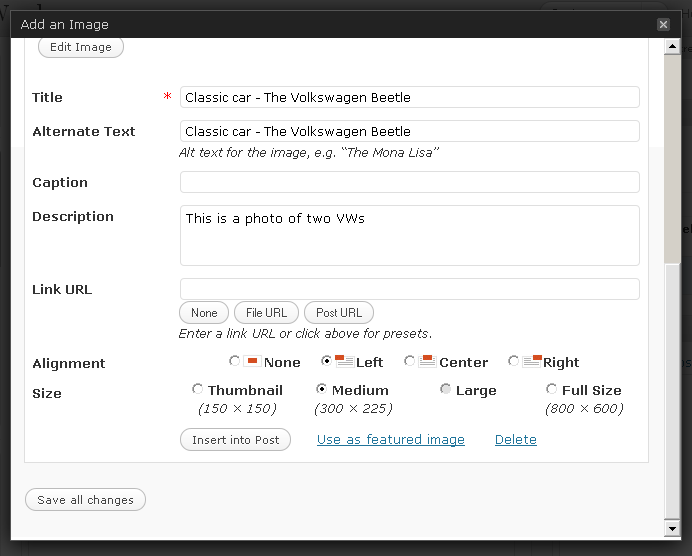
Enter a title, alternate text (for instances when the image doesn't load or a user hovers their mouse over it), and a description.
Why did we skip "Caption"? Because you might not always want to display a caption below the image on the page, for example, when the image is used just to decorate the post or page rather than as something that needs referred to or described.(If you image does need a caption, feel free to add it, then repeat this process later without it and observe the difference)
If you'd like to have the image link to a bigger version of itself, leave the "Link" field in its default state, if not, click the "None" button below it.
With the "Alignment" field you have a choice of word-wrapping options you might have seen before in a standard word processor. Selecting "None" will cause the image to be displayed on a line by itself. Selecting "Left" will cause the text to be wrapped around the image's right hand side. "Center" will cause the text to be wrapped around both sides and "Right" will see the text go to the left of the image.
Choose "Left" and we'll see what happens.
Next we look at "Size". If you upload a large image, WordPress will generate a "Thumbnail" sized image, a "Medium" sized one, and a "Large" one. How big was that image you uploaded? Below the final option "Full Size", it will tell you. If the image you uploaded was greater than 150x150px, "Thumbnail" will be activated and available to choose, if the image was a bit larger "Medium" will be activated and available to choose. Select one.
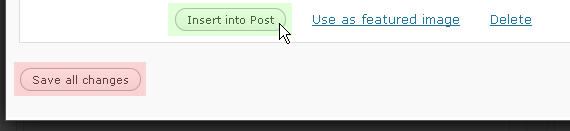
Below this point there are two buttons. Be careful you don't rush through this part. Clicking "Insert into Post" will save the changes you made to the item to the file in the Media Library and at the same time place the image into the body of the text. "Save all Changes" will only save the changes and close the window! If you click this by accident, you'll have to choose to insert an image again. You won't need to upload anything, instead you'd go to your Media Library and insert it from there.
Publish the post! We'll need it in the next lesson.

