Navigation Menus
WordPress 3.0 introduces a new navigation menu feature. As WordPress transformed from a simple online blog platform to something more complex and professional, forming the basis for larger websites with many Pages as well as Posts, different themes had to work out how best to display the site structure to the user. Listing the pages in the sidebar as used to be the way wasn't good enough anymore. Themes instead invented crude menu bars that spanned across the top of the page, usually under the header logo. Unfortunately, most of these menus were very difficult to do anything with other than display a list of pages and sub-pages. To do any complex customization, such as exclude certain pages or add a category to the menu, the website owner would have to open up the theme files and modify the PHP code. It was often pointless to use a dynamic menu at all.
Today Themes that are compatible with WordPress 3.0 no longer have this problem. Just as WordPress has sidebar areas, it now has menu areas. These menus can have all manner of things added and ordered on them with a simple visual tool in the Dashboard. The first theme compatible with this new system is Twenty Ten, the default WordPress 3.0 theme. It would be a good idea to activate this theme to follow through this lesson.
By default Twenty Ten lists all the published Pages in its top navigation menu just like older themes did. Just like the sidebar displaying a couple of default static widgets that are overwritten when adding dynamic widgets, these values can be over written by adding a custom menu to this "menu area".
In the Dashboard, go to "Appearances" then click "Menus" - something only available if the currently activated theme has menu areas.
You will be taken to the "Menus" page.
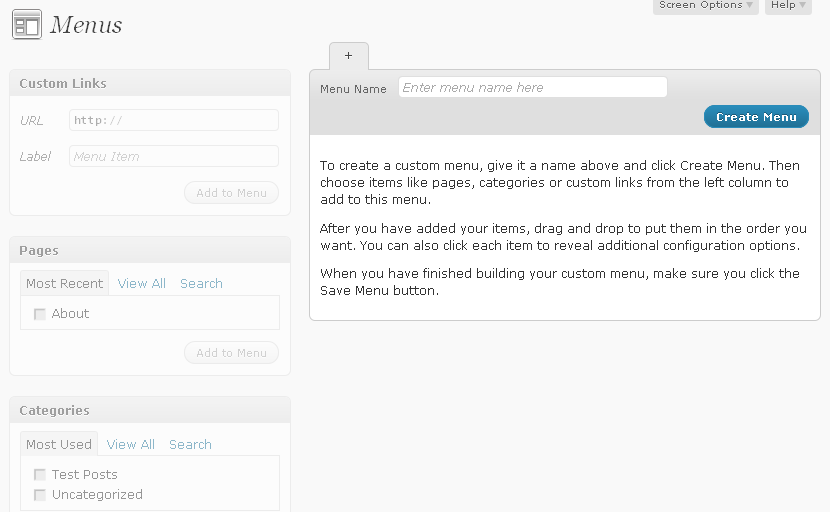
Split into two columns, the left-hand column displays all the possible content you can added to the menu, while the right hand column lets you create and manage menus. The left-hand options are currently disabled because we have yet to add any menus.
In the right-hand box, enter "Main Menu" for the menu name and click "Create Menu".

The left-hand side is now active. As you can see this theme supports one menu area, it's called "Primary Navigation". Placed into that menu area is "Main Menu", the empty menu we've created on the right.
On the left, under "Primary Navigation" click "Save" to make this selection permanent.
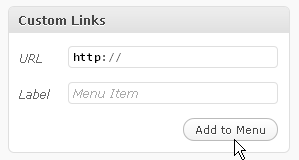
Let's scroll down a little and add a custom link to WordPress.org.
Enter "http://www.WordPress.org" into URL and enter "Get WordPress!" into Label. Click "Add to Menu"
Scroll down a little more to "Pages". Click the "View All" tab so you can see all your pages.

Check the checkbox of each page or click "Select All", then click "Add to Menu".
Finally, scroll down and add a Category or two.
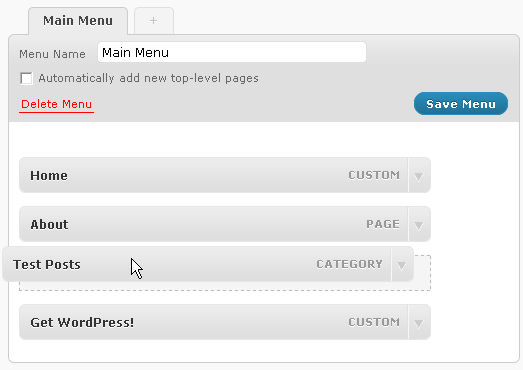
You can now drag and drop the items in your menu to change the order they appear in. Click "Save Menu", then visit your blog to see the changes!