|
|
|
|
Over and under exposure with flash
The EV-thirds go to that's why, between each number, there are 2 small scratches that I can also use. This allows more precise control over the photo.
To move the EV I'll use the arrows left and right of the central wheel. You can see them in the green box.
In this picture the EV is set to 0, which is generally where it should be for normal photos. Just going to change when a photo comes to us on exposed or exposed sub.
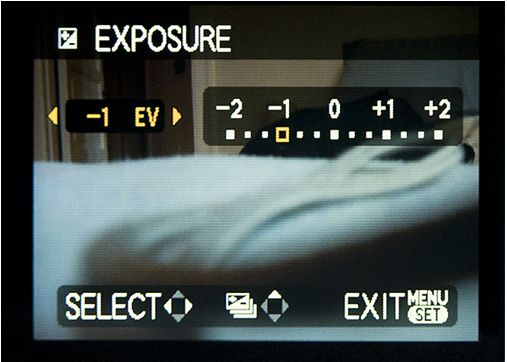
So if we take a flash photo and the photo is overexposed we have to decrease the intensity of the flash. For this we decrease the EV or we will use a negative EV. In the photo below you can see how I changed the EV 0 to -1.
Sometimes it is difficult to determine which use EV so you have to do is remove several photos until we find the correct exposure.
If, however, the picture is sub exposed, or not receiving enough light flash, what we do is increase the EV using a positive EV.
In the photo below you can see how I changed the EV to +1.
Of course change the EV has a limit. We can only increase or decrease the flash output by 2 points. Sometimes even then the picture is not good.
|

