Organizing the text in a list
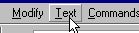
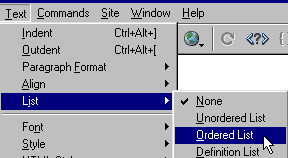
Sometimes, it is useful for us to organize our text in a list. On the toolbar, we click on Text, just as you see in the following image.
And we select List,
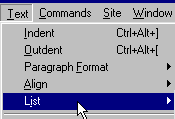
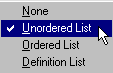
Then, we select the type of list. For example, Unordered List.
In our result, a dot will appear. As we write, if we click on Enter a new dot will appear, just as you see on the following list:
- This is a list
- Of elements
- Without order
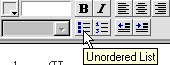
We can do the same with our Properties menu.
We could also used an ordered or numbered list.
- This is
- An ordered list
- With numbers.
- We write and click on Enter to make the next number appear.
- If we click on Enter twice, the next line won't have any number on it.
The same task can be done by clicking on the 'Ordered List' icon you see on the image below.

If we want our list not to start with number 1, we can alter the properties of the list.
- We create a list by clicking on the button you see on the previous image.
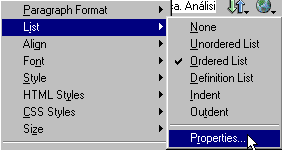
- We place the cursor behind the number 1 and we click on the right button of our mouse.
- On the menu that appears, we click on List
- On the next menu, we click on Properties
A box will appear. In it, we can modify the the characteristics of our list. In our example, we have stated we want to start our count with number 2. Then, we click on 'OK'.
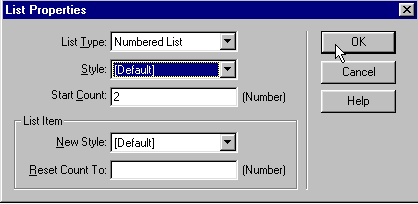
As a result, our list would begin with 2:
- We write here and click on Enter
- And we create a list starting from 2.
- We can also change its style.
We can create lists with different styles.
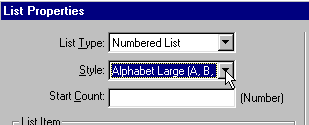
- For this list, we chose letters instead of numbers.
- And we create a list with letters
- There are other option

